Below is a glimpse of our first apartment in Provo. We were living large...500 square feet! Yes, we had hideous blue commercial carpet. Yes, we had a swamp cooler that was so obnoxiously loud we had to shout across the room to talk to each other. Yes, many hours were spent on this coffee table studying for tests. I'm getting super nostalgic here...yikes. Can you tell I miss Provo a bit? (weird!)
About that coffee table. We bought it from Target when we first got married. It worked really well but we found ourselves always wanting to put our feet up on it and it was super uncomfortable (#firstworldproblems). So for a few years I searched everywhere for an ottoman and couldn't find anything I really liked. I bet most people could find something quicker than that, but I was on a budget and didn't want to dish out $500 for something I didn't love. When we were visiting family, my aunt Leslie mentioned they were going to make their own ottoman. After some thinking, Cory and I decided we could do the same. This way, we could save money and could make it exactly how we wanted.
Here is how we made it:
MATERIALS
- 2 yards of fabric (I used Robert Allen's Casablanca Geo in Citrine at $18.95/yard=$42.89)
- Staple gun
- Sewing machine, heavy duty needle and thread
- 1.3 yards of foam (Foam was 50% off plus a 10% off coupon at Jo-Anns=$36.58)
- Screws
- Spray paint
- Wood: 1 4x4, 1 2x4, and 1 2x4 sheet of plywood
- Spray adhesive
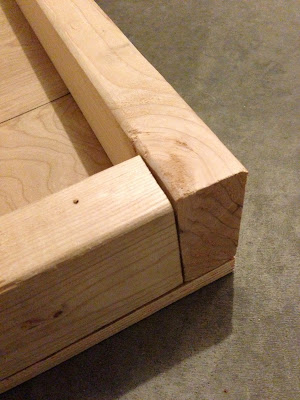
We decided the size we wanted and luckily, the piece of plywood we bought was pretty close to that. No cutting needed there. Then Cory cut the 2x4 into four pieces to make the frame.
Ok guys. Who knew foam was so expensive? I seriously do not understand this. But here is the spray adhesive we used to glue the wooden frame to the foam.
(Side note: most people would put batting and/or foam to covering the wood on the sides. I was so tired at this point and didn't really care. But it would have been smart to have that extra padding.)
So now the fun part: the fabric! I placed the fabric on top of the foam and board and lined up the pattern. I also tucked in the corners so I could see what it would look like once sewn together and the edges stapled down.
Then I untucked the fabric and measured about two inches from the frame (two inches was plenty of room and I ended up having to cut a lot off the bottom after stapling). I drew a line around the entire ottoman, and then cut the fabric along the lines.
I also cut a line from the bottom corner to the top corner, where the seam would be.
This is where my fold would be:
All cut and ready to sew.
Using upholstery thread and a thicker needle, I sewed a line about an inch from where I cut my corners. I did this for all four corners.
Then I put the cover back on and to my astonishment, it fit!
Had a little too much fun with the staple gun.
Then Cory had to make the legs. This part ended up being the biggest headache. He cut the 4x4 into four pieces to make the legs about nine high.
He drew on the frame where the legs would go and then numbered each leg to its designated corner.
Drilled a hole in each corner and lined them up with a screw on the leg.
We sanded the legs down and spray painted them dark brown.
Accidentally covering the labels Cory put on, we had to guess which corner they belonged to! Oops.
At this point I remember it being super late and night and we were both so tired. But I was so excited to have this bad boy done!
And here it is! This was our old apartment in Kansas.
And then our place here in CA. I was so pleased with how it turned out! And thanks to Cory for doing all of the hard work.


